This process only applies to pre-version 4.1.26+ software. If using version 4.1.26+ please go to this knowledge base article.
Step 1. Settings Page
On the homepage of the AxIT app, open the settings menu by clicking on the Cog in the upper right hand corner.
Step 2. Enter Device Page
Click on the Device Page to access the settings for the devices.

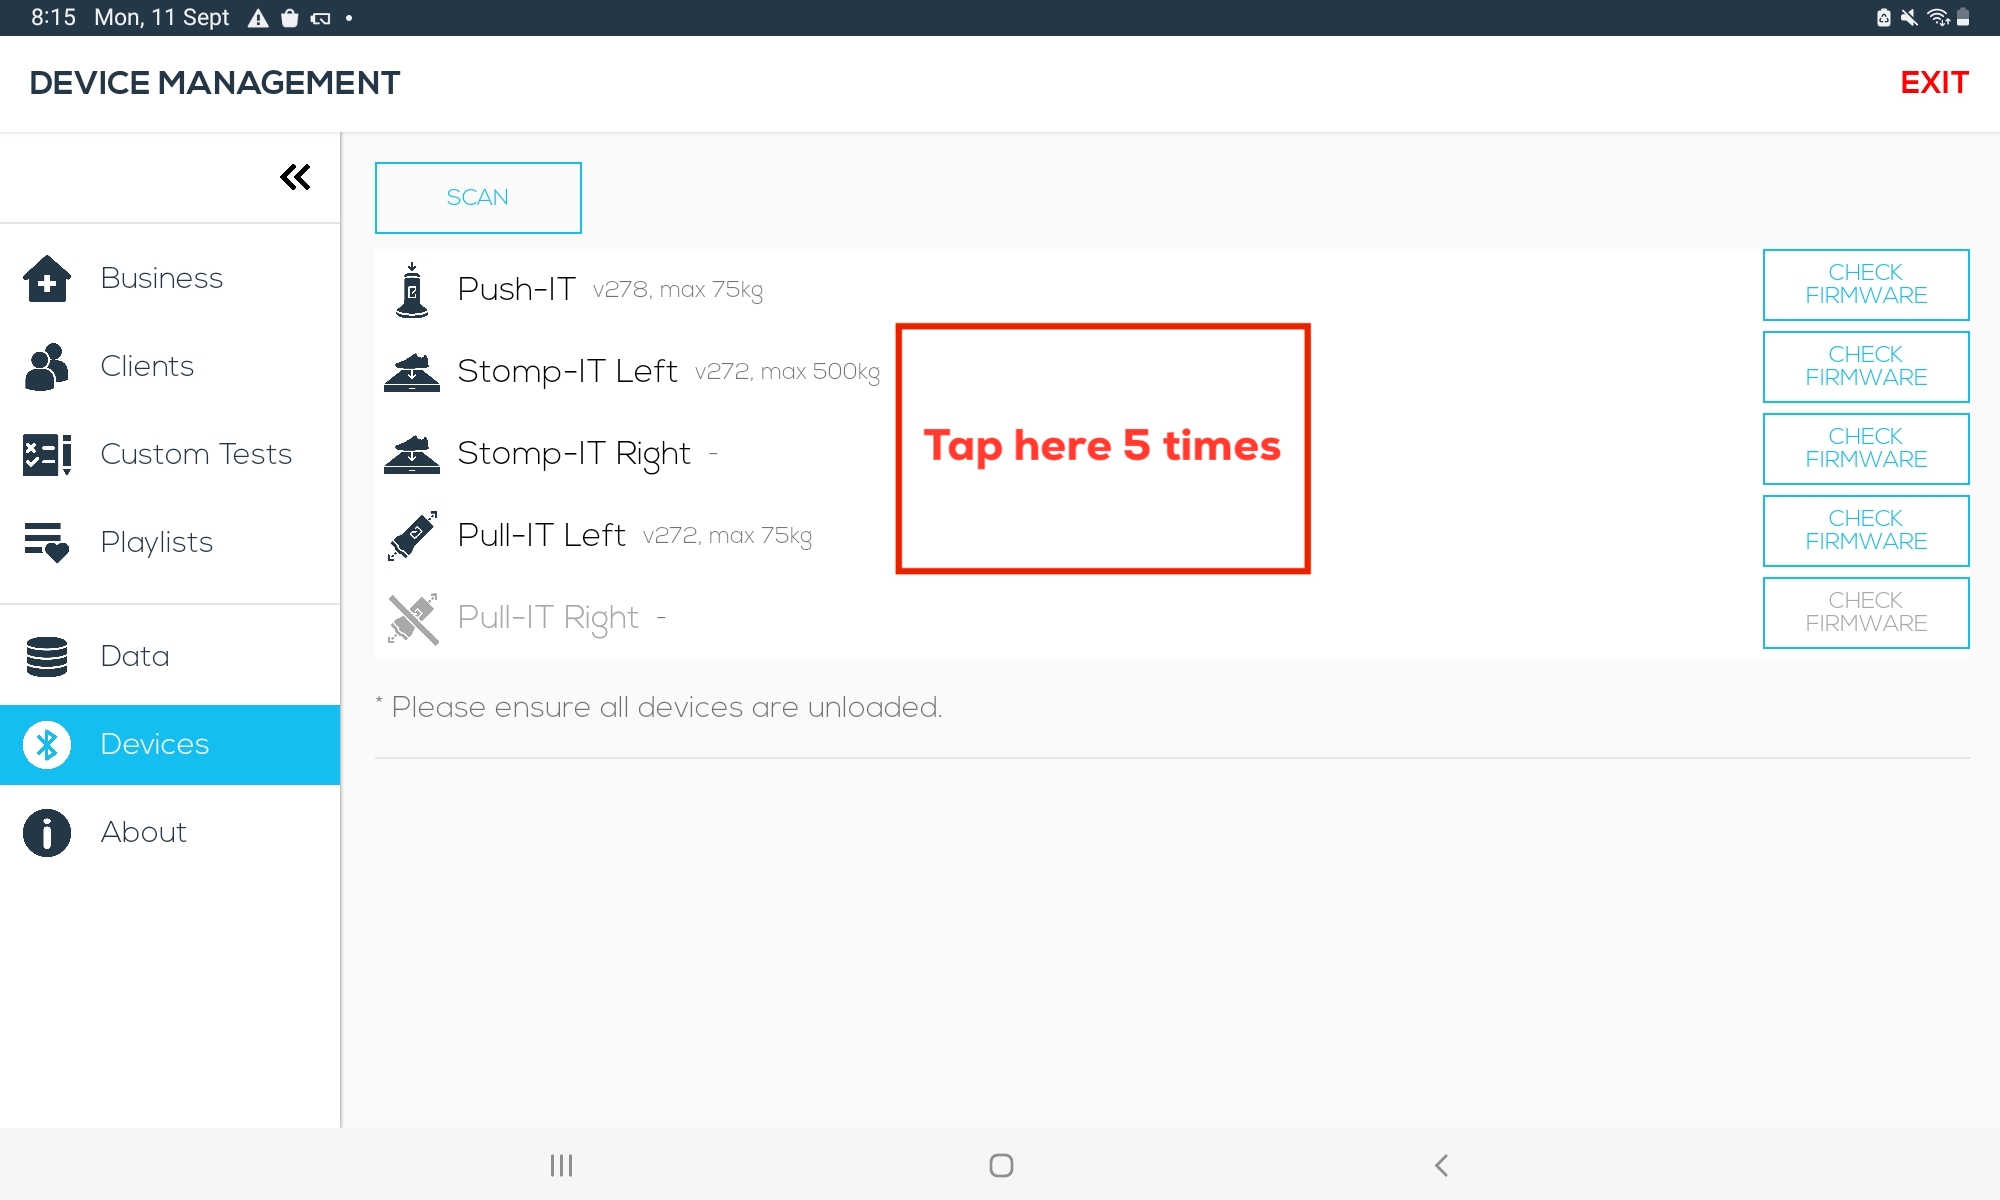
Step 3. Unlock the Device IDs.
Tap the white space in the middle of the screen 5 times, then tap 'Yes' on the dialog to enter the device editing mode.
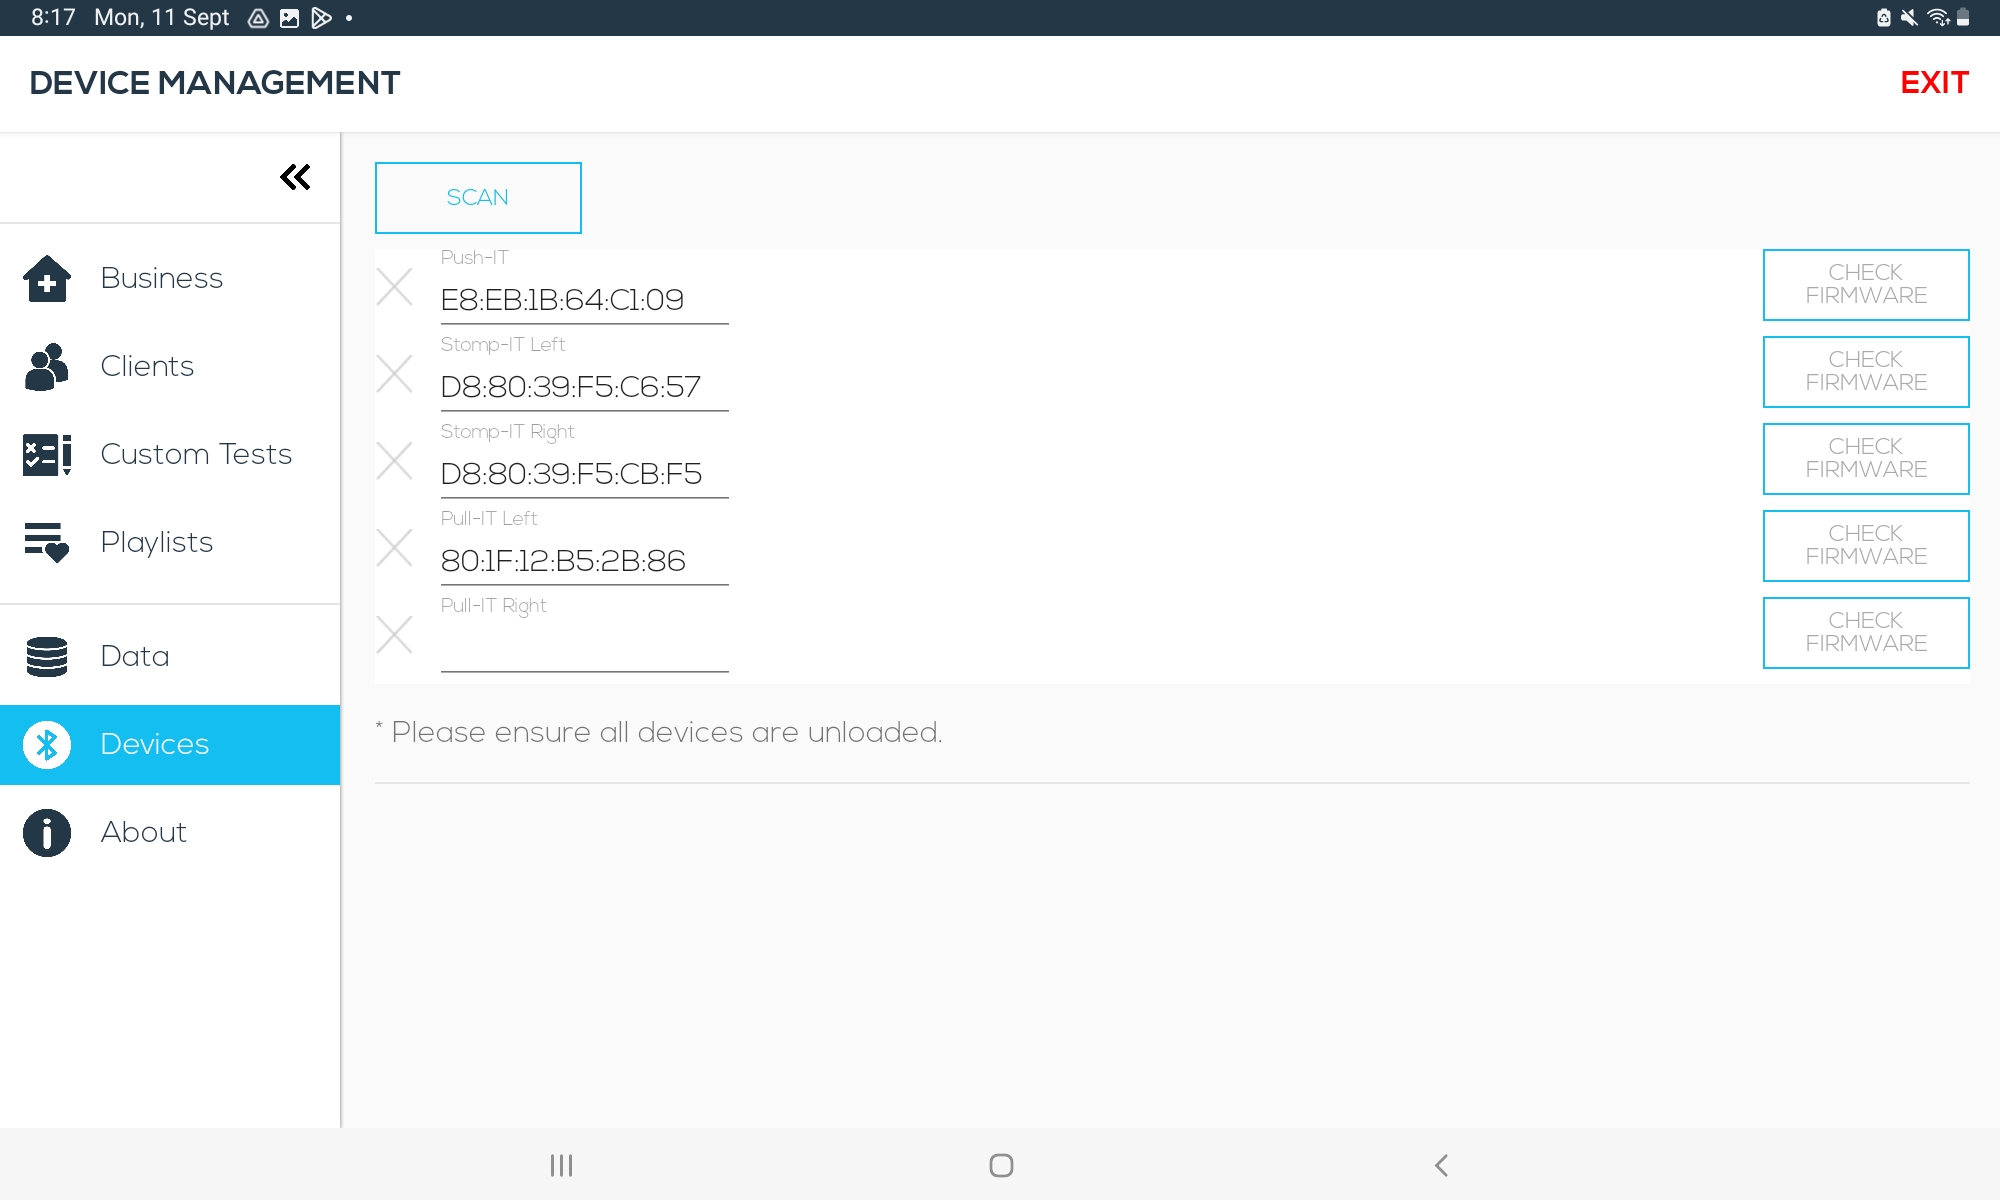
Step 4. Add new Device ID.
Remove the previous device ID by clicking the ‘X’ next to the ID of the device you are looking to replace (note only do this for the device you are replacing). You can then enter the Device ID (this is a unique identifier you will be provided with the device).
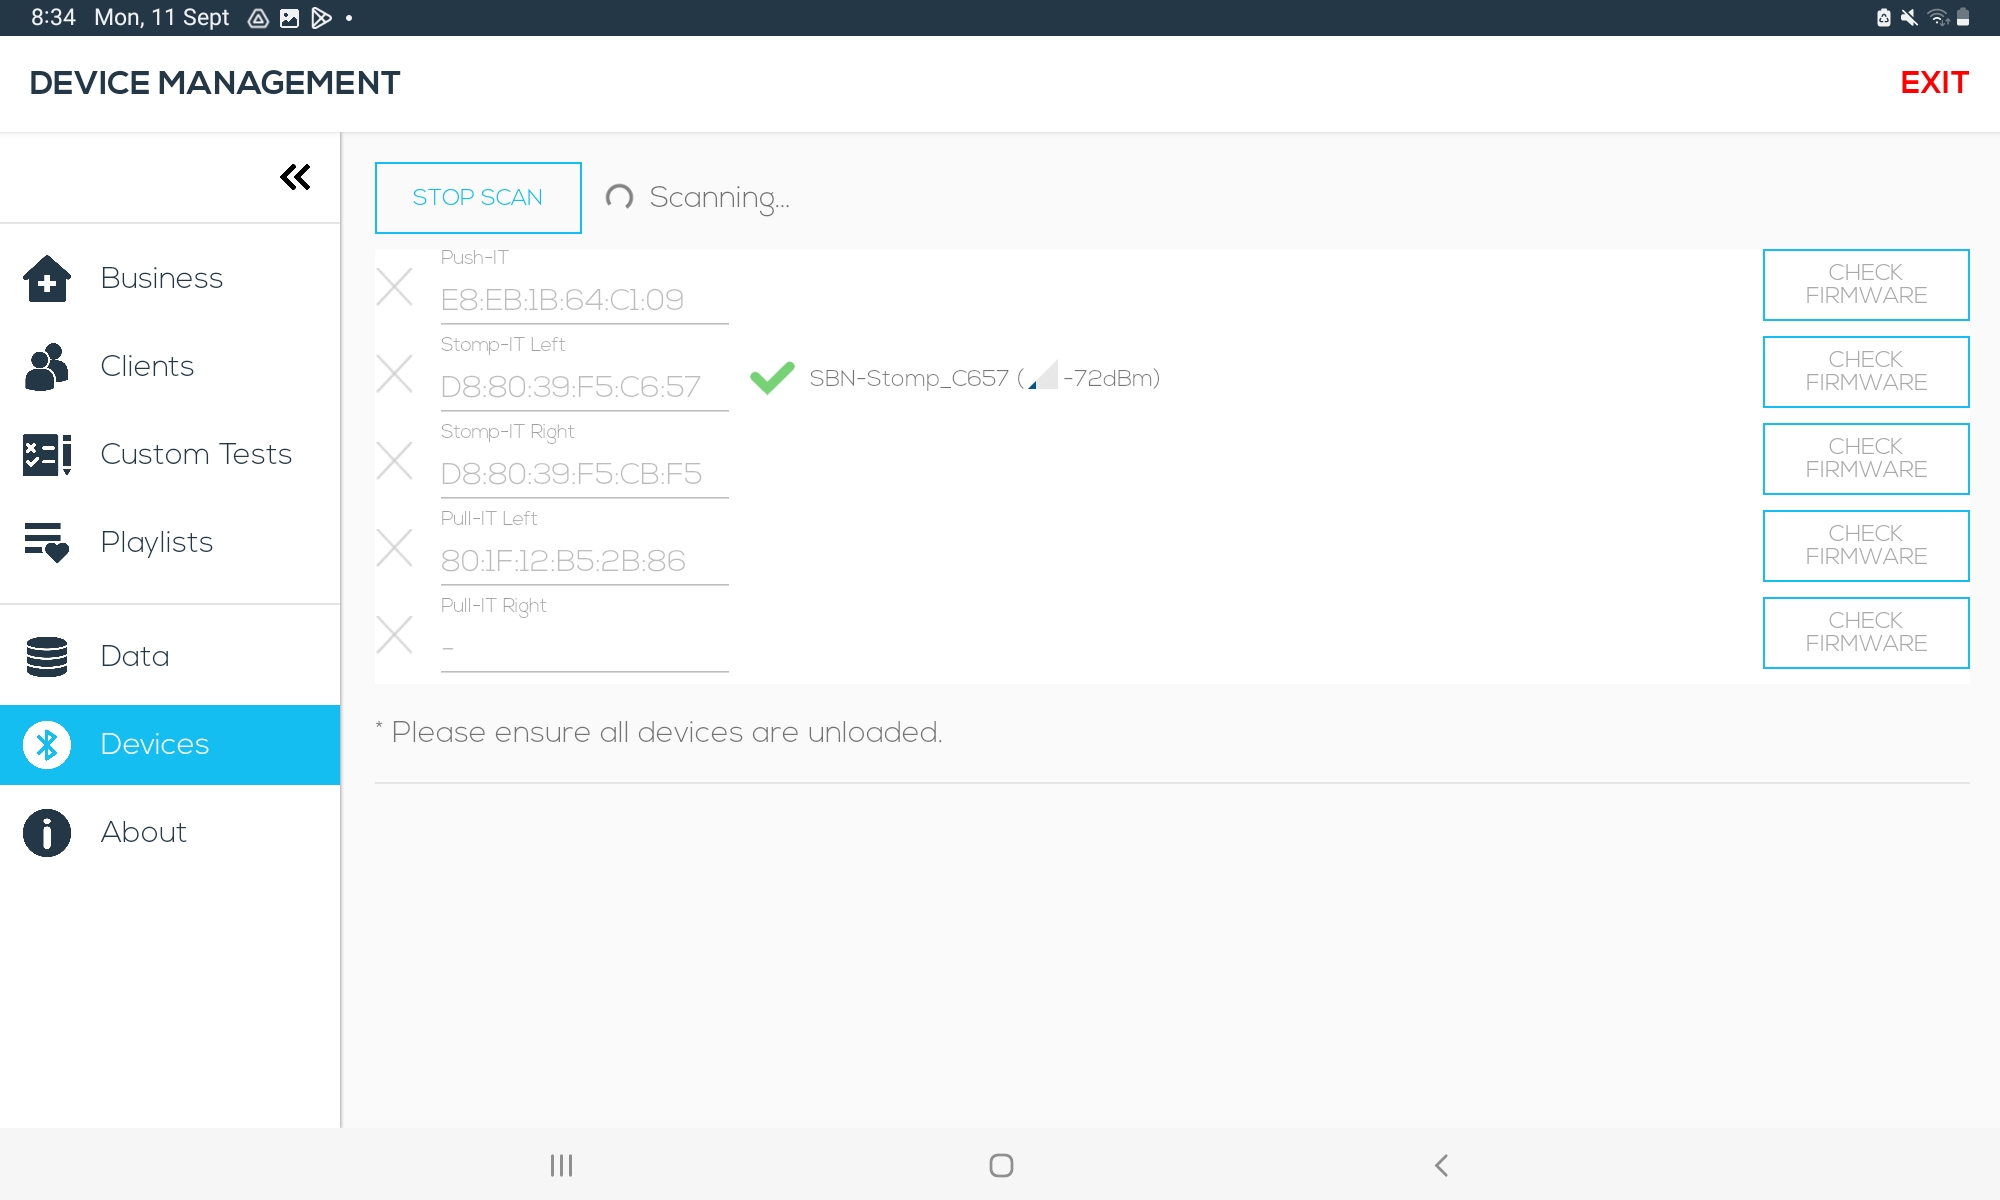
Step 5. Scan for Device
Make sure the device is located nearby and charged. Press the Scan button at the top left of the app screen to commence scanning for the device(s). Once it finds the device green tick will appear next to the device. When the green tick appears this saves the device ID into your app.
Your device is now successfully saved. Press STOP to stop scanning. You can now press the Home button to return to the home screen.
Remember when running this device to Calibrate it the first time without any load on it.