
Position: Set up the AxIT Timing Gates in a straight line at the chosen distance. Position one gate at the start line and one at the finish line. If required, place additional gates at intermediate distances (e.g., 5m, 10m) to record split times.
Cue: “Start just behind the first gate (or within the gate if using In-Beam Trigger). Sprint through the course at maximum effort, continuing through the finish gate. Run straight through—don’t slow down before the finish.”
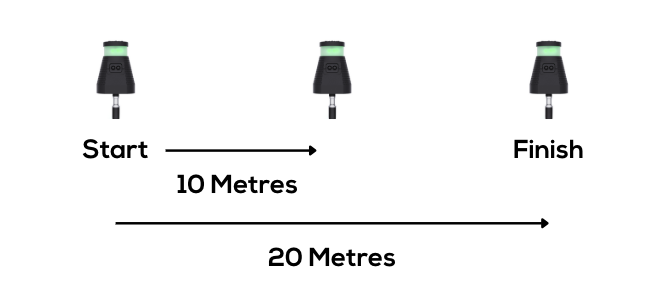
Standing Sprint Test Variation
Position: Set up the AxIT Timing Gates in a straight line at the chosen distance. Position one gate at the start line and one at the finish line. If required, place additional gates at intermediate distances (e.g., 5m, 10m) to record split times.
Cue: “Start just behind the first gate (or within the gate if using In-Beam Trigger). Sprint through the course at maximum effort, continuing through the finish gate. Run straight through—don’t slow down before the finish.”
Procedure:
Step 1 – Place the Timing Gates at the selected start and finish distances. Add extra gates if split times are needed.
Step 2 – In the AxIT Timing Gate app, create or select the athlete/team and choose Sprints as Drill Type. Select Distance and Type of sprint test under Drill Type.
Step 3 – Choose trigger type then click next:
-
Standard – timing starts when the athlete crosses the start gate.
-
In-Beam – timing starts when the athlete is already in position between the start gate. Start gate will display red light when activated.
Step 4 – Ensure all gates are powered on, scan and connect them in the app following the prompts, and confirm their order. Use the Flash function if needed to identify/reorder. If split distance needs to be adjusted click on the distance icon.
Step 5 – Tap Start Trial in the app. Position the athlete as required.
Step 6 – On the athlete’s sprint, the system automatically starts when triggered and stops when the finish gate is crossed. Any intermediate gates will record split times.
Step 7 – After the sprint:
-
Tap Save Trial to store the result.
-
Tap Redo if you want to retest without saving.
Step 8 – Review results in the app. Use the Leaderboard icon to compare trials or switch between athletes.
Fly Sprint Test Variation
Position: Set up a run-up (fly-in) zone before the first gate to let the athlete reach top speed. Position the first gate at the start of the timed zone and the second at the finish. Allow roughly 15 to 20m of run-up before the first gate. Example: a 20m fly-in leading into a timed 10m or 20m zone.
Cue: "Build gradually through the run-up so you hit top speed right as you reach the first gate. Hold that speed all the way through the finish gate. Don't slow down until you're well past the finish."
Procedure differences from the standard sprint:
Gate placement: Place the Start and Finish gates at the ends of the timed zone only, leaving a clear run-up zone in front of the Start gate.
Trigger type: Always select Standard. In-Beam will not work here, because the athlete is already moving when they cross the first gate.